Creating This Site
This site has been in active development for …. has it really only been a week?? It has seemed much longer. Not gonna lie, I had some struggles. I’ll talk about those in the Struggles section. But first, the things that actually worked for me!
How it was made
You can find the source code for this site on github. I used Tina CMS with Hugo and the m10c theme. I’ll talk more about hosting and deployment in a follow-up post.
First, set up a repo on Github (or Git platform of choice). Also make sure you have Node.js and npm installed. Finally, set up an IDE of your choice (I use vscode)
Setting up TinaCMS and Hugo
Now that you have a repo, node, and an IDE, it’s time to set up TinaCMS. I used the starter.
- Run
npx create-tina-app@latest - Follow the prompts (note that a lot of TinaCMS docs use yarn as the package manager, so maybe consider using yarn instead).

- Important! In the package json, add
--destination ./staticto the build command afterhugo. (I will discuss why in the Struggles section).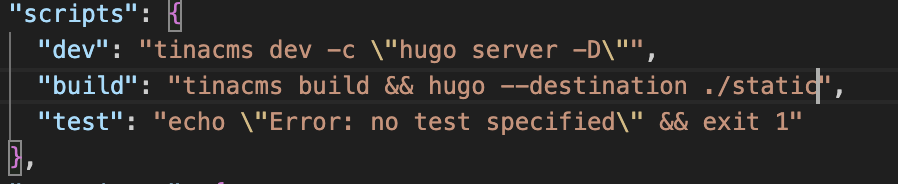
- Also Important! Configure Hugo to use relative paths by adding
relativeURLs = trueto theconfig.tomlfile, especially if you usebaseURL = '/'(Again, see the Struggles section for why) - The setup instructions include a line about how this assumes you have Hugo running on your machine. I ran
brew install hugo(windows set up instructions here). However, hugo may or may not be running on the server you deploy your site to. So I’d also recommend adding hugo-bin-extended to your package.json file withnpm i hugo-bin-extended. - Run
npm run devand go to localhost:1313 in your browser.
- Create an account on TinaCMS cloud and set up a project, following this doc. Once you have an account and a token generated for your project, you can then export the variables TINA_CLIENT_ID, TINA_TOKEN, and TINA_BRANCH with the values you created.
- Run
npm run build
Configuring Themes
This is an optional step, but you can find different themes here. I used the m10c theme. Setup is mostly the same as the README. Git will also ask you to run git submodule add https://github.com/vaga/hugo-theme-m10c themes/m10c before pushing your local branch to github.
Struggles
- Hugo’s default destination for generated static pages is the ./public folder. This meant that all the stuff for TinaCMS was not added to the output folder. Adding
--destination ./staticto the hugo build command fixes this. - CSS/JS for the generated pages originally had incorrect paths in the html (e.g.
/<css/file/path>). This meant that the site was deployed without any styling. I setrelativeURLs = true, and now my site has styling.
Wrapping Up
I hope this helped you set up your own TinaCMS and Hugo site. Next up, deploying sites on push to the main branch with Github Actions!